sms: chocolate caramel mousse tart

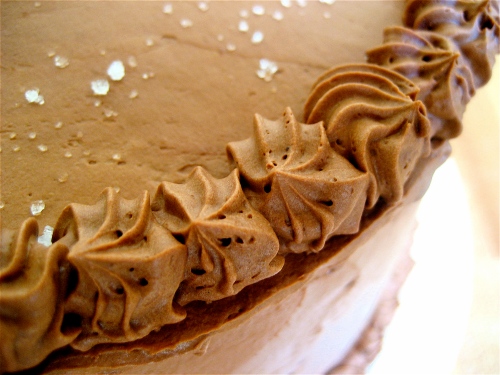
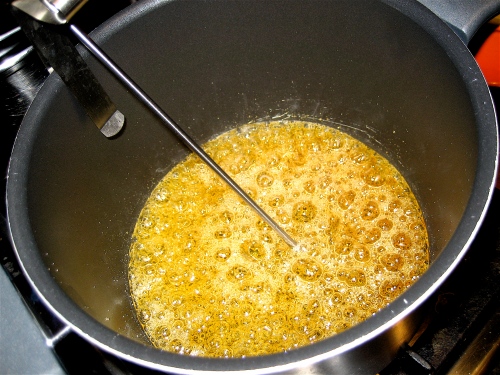
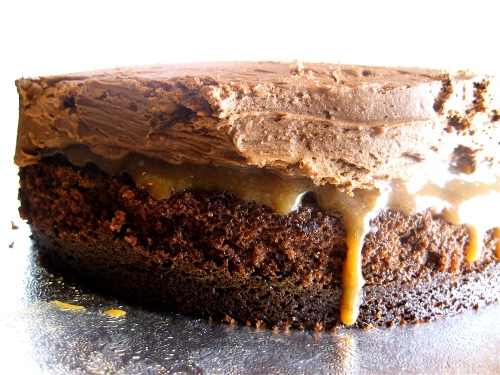
This week’s  SMS challenge – Chocolate Pie crust – offered us the chance to get creative using a filling from outside the book.  Based on comments from a few of the other bakers suggesting the crust lacked flavour, I doubled the cocoa powder as well as the amount of sugar called for in the recipe.  In a bid to spare the ol’ waistband after the gob-stuffing marathon I’ve indulged in over the past few months, I also opted to make it into a 7 inch tart filled with chocolate mousse made from tofu and agave syrup (from Vegan Cupcakes Take Over the World). That said, I went ahead and annihilated any health benefits by adding a chocolate caramel base layer with toasted hazelnuts (using my leftover caramel ‘sauce’ from last week). To be honest, the crust probably still lacked sweetness, but luckily my filling was so deadly rich that it worked out quite well.

Big thanks to Donna of L’Amour de Tarte for this one! Please check out what the other SMSers came up with too xx

6 Comments

Filed under caramel, chocolate, pies & tarts, sweet melissa sundays

the great malt ball debate: a clash of cultures

“What do you mean malt balls? What are malt balls?”
“Malt balls.. you know, powdered malted milk balls covered with chocolate…”
“Nope, doesn’t ring a bell…”
“What? Of course you know malt balls.. like maltesers, you love maltesers!”
“Yeah, I know maltesers. But not malt balls. No one calls them malt balls.”
“What??! But that’s what they are! Maltesers ARE malt balls. Like kleenex are tissues!”
“That’s crazy talk.” (or something like that).
“What?! You’re crazy! That’s exactly what they are, what else would you call them?!”
“Maltesers. But anyway, she’ll like the cake, whatever it is.”
“That’s not the point now! And some people DON’T like them! Just ask her, she’ll know.”

This was the conversation that ensued when I asked my British other half to find out if his sister liked malt balls.  It was her birthday and a cake was called for, but as usual, I was paralyzed with indecision as to which underused cookbook/impulse buy to draw on.  I’ve managed to make one recipe out of Baked before – and although that cake put me through hell, it was damn good.. So I figured their Malt-ball Cake deserved a go too.  Having read a few reviews by parties claiming to be less than keen on the malt flavour after all, I just wanted to be sure the birthday girl would appreciate my pick…

[phone call made]
“She doesn’t know what malt balls are. But she said she’ll like whatever you make.”
Argh.

i need a spirit level

The cake turned out beautifully – pure white with a meltingly soft texture and what I’d describe as a tight (but certainly not dense) crumb.  While the Baked boys opt for a simple chocolate ganache frosting, I decided to double up on the malty magic by using a malted milk chocolate frosting from the Sweet Melissa Baking Book.  Be warned, it’s very rich.  But very good. The texture threw me a bit actually, as it seemed slightly.. tacky (if that makes sense to anyone?).. in the bowl, but that might have been the milk chocolate I used and it tasted delicious nonetheless.

And the combination was killer.

You can find the recipe for the Baked cake here, but in respect for the SMS enterprise, I’m going to hold out on posting the Sweet Melissa frosting recipe.. (I’m happy to email it though if anyone is in desperate need!) xx

1 Comment

Filed under cake, chocolate, frosting, Uncategorized

sms: chocolate creme caramel… sauce, doh

This week’s ‘back with a bang’ SMS recipe was for Chocolate Creme Caramels.  Unfortunately, there was less bang and more flop here in my kitchen… and I accept full responsibility.  Things started out well – I had all the ingredients, read through the recipe in full (for once), chopped up the chocolate in advance, combined the syrup, honey, etc in my saucepan, stood my spiffy digital thermometer at attention, and waited…. and waited…. and waited…. After about 35 minutes, my syrupy mass started to bubble and rise..then REALLY rise, right up to the very top of the saucepan (sending me into a bit of a panic), but after 45 minutes, when it STILL hadn’t reached even 240F, my patience ran out.  I gave up the boil, added the chocolate and vanilla, then poured the whole shebang into a pan and crossed my fingers.

No luck. As you can see, the caramel failed to harden, so now I’ve got a bucketful of something in between sauce and sludge.  But hey-ho, at least it’s tasty.. in fact, it would probably make a luscious ice-cream topping, warmed up enough..    Big thanks to Jeannette for choosing this would-be yummy treat (you can find the recipe on her gorgeous blog), because despite my flop, at least I’ve come away with a new resolution: Be more patient – good caramel comes to those who wait x

9 Comments

Filed under Uncategorized

holiday catch up: thanksmas leftovers

After stuffing my face for the past two months with cakes, pies, cookies, crumbles, crisps and cheesecakes, I seem to have come away with very few pictures to show for it (and all too many pounds..dammit). What follows are the only souvenirs I could find of some memorable bakes served at a ‘Thanksmas’ dinner we hosted for friends (on Dec 12th, hence the name..otherwise it was my 4th annual Thanksgiving do here in the UK) and at my family’s Christmas Day meal.  First up, a beautifully moorish sour cream pumpkin pie from Dorie Greenspan’s Baking, followed by a sweet & gooey pecan pie made with Lyle’s Golden Syrup.  I can only offer the ‘before’ picture for that one because unfortunately I didn’t manage to snap the finished product before it was devoured.  Next up is an adaptation of Rose Levy Beranbaum’s Gascon Apple Pie from the Pie & Pastry Bible.  This boozy treat is actually my You Want Pies With That? entry for December.  I got to choose the theme this time, woohoo!!! So please have a look at what the other lovely piemakers have offered up as their ‘holiday spirit‘ pies.  And the final picture is really the only  snap I’ve got of two phenomenal cheesecakes: my celebration stalwart, a luscious White Chocolate (Orange-) Cranberry Swirl number, and the Chocolate Espresso Cheesecake from the Sweet Melissa Baking Book (with an oreo cookie crust, whipped cream piping and a gorgeous blackberry compote topping).

i suggest adding any leafy embellishments before you've got just 10 mins left on the timer.. ahem

pecan pie beginnings


Boozy Cran-Apple Pie

chocolate espresso cheesecake & white chocolate cranberry swirl cheesecake ...and another duck face pose.. i need a new look

You can find the recipe for the pumpkin pie here – this is the fourth time I’ve made it, and it won’t be the last.  Rose’s Pecan Pie can be found on page 302 of the P&P Bible and I think it’s earned it’s place as my new Go2, although (as I always find with pecan pies) I had to bake it about 20 mins longer than recommended.  Luckily my pie shield saved the crust from overbrowning.  The Chocolate Espresso Cheesecake was a recent SMS bake and you can find the recipe here on Shandy’s lovely site.  It cratered on me the first time around so I didn’t post in time (shame on me).  The one pictured above also cracked and fell slightly (I covered that up with piping and blackberry compote), but I think I figured out the culprit – I love crumb crusts so much that I always do enough to coat the sides of the tin too and that’s never been a problem with my stalwart.  But I’m pretty sure thatcheesecakes (without side crusts) usually pull away a bit from the tin, so I’m betting that with a crust and without the *give* offered by a fruit swirl for example, the poor cheesecake could do nothing but crack.  At least, that’s my guess…  I promise to post the YWPWT apple pie recipe after we get back from Dorset, as  I made some changes to Rose’s original based on what my liquour cabinet (haha, I wish) had to offer and what the holiday season called for – cranberries.

*RECIPE UPDATE*

Boozy Cran-Apple Pie

Adapted from Rose Levy Beranbaum’s Gascon Apple Pie

4 medium apples – peeled, cored and sliced 1/8 inch thick

1 cup cranberries

3 tablespoons granulated sugar

5 tablespoons light brown sugar

1/8 tsp salt

1/3 cup brandy (or cognac)

1/2 tsp orange extract

3/4 cups walnuts, lightly toasted and chopped

7 tbs unsalted butter, melted

12 sheets of filo

powdered sugar for dusting

Directions:

In a large bowl, gently toss the apples and cranberries with the sugars, salt and alcohol.  Cover tightly and allow to sit at room temperature for at least 2 hrs (or overnight – in which case, refrigerate them).  Drain the fruit, reserving the juice.  You should have about 1 cup.  Using a small saucepan, reduce the liquid until you have approximately 4 tablespoons.  Add the orange extract then pour the liquid over the fruit and mix in the walnuts.

Preheat the oven to 375F.  With a pastry brush, lightly coat the bottom of the pie pan with some of the melted butter.  Place the filo sheets between two sheets of plastic wrap and cover with a damp towel – re-cover each time you remove a sheet to stop the rest from drying out.  Remove 1 sheet and quickly brush it with unsalted butter (don’t worry about coating every inch, too much butter will just result in a greasy texture anyway).  Drape the filo sheet in the pan, molding it to fit and letting the excess drape over the sides.  Repeat with 7 more buttered sheets.  Empty the fruit mixture into the filo-lined pan, bringing the overhanging bits up and over to enclose the filling partially.  Brush another 2 sheets with butter and fold them crosswise in half.  Butter them again on both sides, then place them on top of the filling, covering it completely, and tuck the ends into the sides of the pie pan.  There will be a depression in the center.  Butter another sheet of filo and cut it in half.  Gather up each piece in loose ruffles and arrange it toward the centre of the pie to partially fill the depression. Butter the final piece of filo and fold it in the long way into thirds.  Coil it loosely to form a rose and place it in the center.  Bake the pie for 50 to 60 mins or until the filo is golden and a skewer inserted into the fruit filling meets with little resistance.  Allow the pie to cool to room temp as the moistened pastry can be a bit tough when warm.  Dust lightly with powdered sugar before serving.

This was the perfect end to my family’s Christmas Day meal. Biting into the crisp pastry to find deliciously caramelized apples & cranberries made for a lovely treat – and the boozy kick made things all the more merry. Enjoy!

Leave a comment

Filed under cheesecake, chocolate, fruit, holidays, pies & tarts, sweet melissa sundays, You Want Pies With That

ginger v maple

Christmas means gingerbread. That’s a given. There was no way around it.

But my fridge demanded a clear out before I could get down & dirty with any more holiday baking…  and it seemed a crime to waste a bowl full of fluffy maple cream cheese frosting… So I went wild.  Gingerbread + Maple Frosting.  Yep, that’s right, I dared to pair two such mighty flavours… and while others might balk, I think it tasted divine.

Gingerbread Cupcakes (from Crazy About Cupcakes by Kristina Castella)
Makes 20-24

1/4 pound (1 stick) unsalted butter, at room temp
1/4 cup dark brown sugar
1/4 cup granulated sugar
1 large egg
2/3 cup light molasses
2 teaspoons lemon zest (I omitted this)
2 1/2 cups all-purpose flour
1 1/2 teaspoons baking soda
1 teaspoon ground cinnamon
1 1/4 teaspoons ground ginger
1/2 teaspoon ground cloves
1 cup sour cream (I used yoghurt instead, as that was what I had on hand)
* I also added 2 tablespoons of chopped crystallized ginger for an extra spicy kick

1. Preheat the oven to 375 F (350 F for dark pans). Insert liners into a medium cupcake pan.
2. In a large bowl cream the butter and sugars together with an electric mixer on medium speed until fluffy, 3-5 minutes. Add the egg, molasses, and lemon zest to creamed mixture. Beat well.
3. In a separate bowl combine the flour, baking soda, cinnamon, ginger, and cloves.
4. Add portions of the dry ingredients to the creamed mixture, alternating with portions of the sour cream, until they are completely integrated, about 30 seconds.
5. Fill the cupcake liners 2/3 full. Bake for 15-20 minutes or until toothpick inserted in the center comes out clean. Cool cupcakes in pan on a wire rack.

*To be completely honest, I found these just a wee bit dense, slightly more muffin than cupcake-like, but the spices were perfect and I ended up gobbling 4 anyway..so give ’em a go and let me know what you think.  Ironically, I used this recipe instead of this month’s MSC pick because so many of my lovely bakemates found that one dense and dry. doh. I thought the sour cream / yoghurt would offer more moisture and a lighter texture, but perhaps not.  That’ll teach me to shirk my monthly duties. Although I wasn’t enamoured with the cupcakes themselves, I think the recipe works beautifully for whoopie pies.  To make whoopies (hyuk hyuk), line a cookie sheet with parchment paper and use a piping bag to pipe out 2 inch rounds of dough.  Bake them for about 5 minutes until puffy and golden at the edges (sorry, can’t remember exactly how long they took).  Fill with maple cream cheese frosting and enjoy xx

Maple Cream Cheese Frosting

12 oz. cream cheese
4 oz. unsalted butter (cut into small chunks)
5-7 cups powdered sugar
3 Tbs. maple syrup
1 tsp. maple extract (if you’re lucky enough to have it!)

Bung the cream cheese and butter in the food processor and whizz til combined.  Add 3 cups of the powdered sugar along with the maple syrup and maple extract, then whizz again.  Add the rest of the powdered sugar cup by cup, processing after each addition, until you get the desired consistency

Leave a comment

Filed under cupcakes, frosting, holidays, Uncategorized, whoopie pie

Ginger {persimmon} spice.. zig-a-zig-ah

Apologies for the dead air folks.. I’m sooooo behind on SMS bakes at the moment, and I’m even struggling to find time (and space in the holiday baking calender) to get through my other monthly commitments.  A few days ago though, I opened the fruit drawer in the fridge to find a bucket load of soon-to-be overripe persimmons that I’d bought in a fit of madness a few weeks ago, so I made the time.  I baked a pie to celebrate Thanksgiving without spoiling my appetite for the numerous pumpkin and pecan slices I intend on devouring during TWO belated T-day celebrations I’m attending and hosting in the next few weeks.  I’ve never baked with persimmons before, but I have deliciously fond memories of kaki crumbles my mom used to make when I was growing up.  SO when I found a recipe for Persimmon Pie in the Pie and Pastry Bible by Rose Levy-Beranbaum, I decided to pimp things up with a crumble topping.  I took the fact that Rose’s suggested crust was of the gingersnap cookie variety as implying that persimmon & ginger go hand in hand, so I also opted for the gingersnap crumble from the Sweet Melissa Baking Book.  (Just so I can pretend I’m keeping up with my SMS duties.. sort of…in some way…maybe?)

Now, I’m sure many of you savvy bakers, persimmon afficianados and gingersnap munchers are probably thinking – Gingersnap crust AND ginger crumble topping? Are you mad, June?  That subtle persimmon flavour will melt under so much heat! And you’re right.  Melt they did – into a creamy, spicy fruit layer which smacked more of ginger than persimmon, as one would expect, even though I doubled up on the persimmon chunks called for in Rose’s recipe.  But it worked.  Oddly, my boyfriend described the fruit filling as “chocolatey”, which made little sense to me – it tasted nothing like chocolate – but maybe he was referring to the smooth gooey texture..?  Plus, I can count the number of times I’ve seen him eat chocolate on one hand.. so there you go.   Anyway, this sweet & spicy pie was the perfect treat to warm things up as winter settles is – give it a try as written below if you love ginger.  You can find the gingersnap crumble recipe here on Jennifer’s lovely blog.  Alternatively, dial down the heat by leaving out the candied ginger in the filling or using a different crumble topping.

ignore the unsightly line across the crumble - that was the result of my crust cover..(which was completely unnecessary by the way)

Gingersnap Crumb Crust from the Pie and Pastry Bible – you can find the gingersnap nut crumb crust recipe that Rose suggested here

180 grams (1 1/2 cups) gingersnap crumbs

2 pinches salt

71 grams (5 tablespoons) unsalted butter

1/2 tsp pure vanilla extract

Process the cookies with the salt until you’re left with fine crumbs (about 20 seconds), then add the melted butter and pulse about 10 times, just until incorporated.  Using your fingers or the back of a spoon, begin by pressing the mixture into the bottom of the pie pan and partway up the sides.  To keep the crumbs from sticking to your fingers, it helps to place a piece of plastic wrap over the crumbs and press them through the wrap.  Be sure to press the bottom thoroughly so that the crumbs are evenly distributed.

Persimmon Pie – adapted from the Pie and Pastry Bible

5 small Fuyu persimmons, peeled and cut into 1/4 inch chunks (Rose actually suggests using 2, but I wanted a chunkier texture)

247 grams (1 cup) persimmon puree (I scooped out and processed the pulp of 3 overripe Fuyu’s, but you could also use ripe Hachiyas as Rose suggests)

160 grams (2/3 cup) milk

108 grams (1/2 cup) light brown sugar

1 large egg

94 grams (2/3 cup) bleached all-purpose flour

1/4 tsp baking soda

1 tsp ground cinnamon

1/8 tsp nutmeg

1/4 tsp salt

14 grams (1 Tbs) unsalted butter, melted

33 grams (1/3 cup) walnut halves, chopped

2 tsp candied ginger, finely chopped

Preheat the oven to 350F (or 325F if using a pyrex pie plate).  Set an oven rack just below the middle of the oven before preheating.
Process the persimmon puree with the milk, brown, sugar and egg for about 8 seconds or until smooth.  In a small bowl, whisk toether the flour, baking soda, cinnamon, nutmeg and salt. Add it to the food processor and pulse about 8 times or until incorporated.  Add the butter and pulse about 4 imes or until incorporated.  Add the chopped persimmon, walnuts, candied ginger and pulse twice, just to incorporate.  (You’ll have bout 3 1/2 cups of filling).  Immediately pour the filling into the prepared pie crust (the acidity in the persimmon reacting with baking soda will cause the mixture to stiffen quickly.)  The filling will reach almost to the top.  Smooth the surface and sprinkle the crumble over the top (I probably had double the amount of crumble needed and although I managed to pat it all into a giant crumble mount, you might want to halve Melissa’s recipe..)
Bake for 35 to 45 minutes or until the crumble has browned a bit and a thin knife blade inserted about an inch from the centre comes out clean.  The filling will have puffed out slightly but on cooling it will all settle.  Serve warm or at room temperature accompanied with creme fraiche or whipped cream.  (The pie can be reheated for 10 mins at 350F.  Be sure to keep the crust shielded with aluminum foil.)

1 Comment

Filed under crumbles, fruit, pies & tarts

msc: candied sweet potato cupcakes

Apologies for the delay folks – I’ve been away for the past few days on whirlwind bachelorette/hen do in Dubai, so I’m posting late and posting in brief (with a lingering hangover + sleep deprivation to blame..)   I baked these tater-ific (hyuk hyuk) treats up a few weeks ago knowing I’d be donning a swimsuit over the weekend rather than an apron, and whoamama am I glad  I didn’t miss out.

These were easy enough to throw together – even with the added step of baking the sweet potatoes – and they filled our tiny flat with the most delicious spicy sweet smell.  I cranked up the cinnamon a bit out of habit and pure cinnamon love, but followed the cake recipe to the letter apart from that.  For the topping, on the other hand, I went off piste. but only slightly.  Instead of melting a few marshmallows and sprinkling on candied pecan as Martha instructs, I opted to make the marshmallow frosting on page 151.

The cakes themselves came out deliciously moist and moorish, and the frosting recipe yielded a perfectly pipe-able mass of billowy marshmallow that set up into nice, firm peaks for torching – but the combination got mixed reviews.  It seems the sticky-firm marshmallow texture came as a bit of a shock to some, and my star taster Big J suggested that a cream cheese frosting would have been a better choice.  Others seemed to like the marshmallow though, so I guess it comes down to personal taste.  (My preference is and always will be cream cheese frosting though, so I know what I’ll be making next time).  Big thanks to Karen for choosing such a tasty, fun recipe this month!  Please check out the site for  peek at how the other (organized, timely.. ahem) MSCers got on with this one x

While we’re on the topic of spicy treats….. I missed the last few SMS picks, (much to my belly’s horror and my waist’s benefit) but I just wanted to big up these gingersnaps, which I baked up for the pear & cranberry muffins with gingersnap crumble before I left for Dubai.  Unfortunately, due to bad planning and poor time keeping, the muffins never materialized, but the cookies were a yummy consolation prize x


perfect with a tall glass of milk


3 Comments

Filed under Uncategorized

recipe update: whipped caramel ganache & salted caramel topping

So… I just wanted to set things right today, after my vicious anti-caramel rant in the last post…ahem.  While the Sweet & Salty cake was a beast to put together – because everything that could have gone wrong did go wrong – I can’t blame the Baked boys.  The whipped ganache frosting and its salted caramel partner are seeeeeeeeeeeeriously good… and I can say that with authority because I’ve only just now dug in properly.  That’s right folks – I saved this behemoth for over a week (!) and it’s still decadently delicious.

So decadent that only one (moderately sized!) piece has done me in. one. that’s unheard of.  So I’m posting the recipe for the whole shebang now (seeing as its posted all over the place already), and I strongly encourage anyone who doesn’t plan to make charcoal out of the caramel or nuke the daylights out of the frosting to have a go.  You may curse me at first, but I’m guessing you’ll thank me later…

IMG_1767

Chocolate Cake *I used the Devils food cake from Sweet Melissa instead (which you can find here), so I can’t vouch for this one!

Makes one 8-inch 3-layer cake
3/4 cup cocoa powder
2/3 cup sour cream
2 2/3 cups cups all-purpose flour, plus more for pans
2 teaspoons baking powder
1 teaspoon baking soda
1/2 teaspoon salt
3/4 cup (1 1/2 sticks) unsalted butter, softened, plus more for pans
1/2 cup vegetable shortening
1 1/2 cups granulated sugar
1 cup dark brown sugar
3 large eggs
1 tablespoon pure vanilla

Preheat oven to 325 degrees. Butter three 8-by-2-inch round cake pans. Line each pan with a parchment paper round, butter parchment paper and flour; set aside.
In a large bowl, whisk together cocoa, 1 1/4 cups hot water, and sour cream; set aside to cool, about 10 minutes.
In another large bowl, sift together flour, baking powder, baking soda, and salt; set aside.
In the bowl of an electric mixer fitted with the paddle attachment, beat the butter and shortening together until smooth and it appears to create strings inside the bowl, about 7 minutes. Add both sugars and continue beating until light and fluffy, about 7 minutes. Add eggs, one at a time, and beat until well incorporated. Add vanilla, scrape down the sides of the bowl with a spatula, and mix again for 30 seconds. Add flour mixture alternating with cocoa mixture, beginning and ending with flour mixture.
Divide batter evenly among the three prepared pans. Bake until cake is just firm to the touch and a toothpick inserted into the center of the cake comes out clean, 18 to 24 minutes. Let cool completely.

Salted Caramel

1 cup sugar
2 tablespoons light corn syrup
1/2 cup heavy cream
1 teaspoon fleur de sel
1/4 cup sour cream

Combine 1/4 cup water, sugar, and corn syrup in a medium saucepan; stir to combine. Bring to a boil over high heat. Cook until the mixture reaches 350 degrees on a candy thermometer, about 10 minutes.
Meanwhile, in another small saucepan, mix together cream and salt. Bring cream to a boil and cook until salt has dissolved, 3 to 5 minutes. Remove from heat and set aside.
When the caramel mixture has reached 350 degrees, remove from heat and allow to cool for 1 minute. Carefully add the hot cream to the caramel; stir to combine. Whisk in sour cream. Cool, and store in an airtight container, refrigerated, for up to 3 days.

IMG_1715

Whipped Chocolate Caramel Ganache

1 pound dark chocolate, chopped
1 cup sugar
2 tablespoons light corn syrup
1 1/2 cups heavy cream
1 pound (4 sticks) butter, cut into tablespoon-sized pieces, softened but still cool

Combine 1/4 cup water, sugar, and corn syrup in a medium saucepan; stir to combine. Bring to a boil over high heat. Cook until the mixture reaches 350 degrees on a candy thermometer, about 10 minutes.
In another small saucepan add cream and bring to a boil. Remove from heat and set aside.
When the caramel mixture has reached 350 degrees, remove from heat and allow to rest for 1 minute. Add the hot cream to the caramel; stir to combine. Let cool 5 minutes. Place chocolate in the bowl of an electric mixer and pour caramel sauce over chocolate. Let sit 1 minute before stirring from the center until chocolate is melted.
Attach bowl to electric mixer fitted with the paddle attachment and mix on low until the bowl feels cool to the touch. Add butter and increase speed to medium-high until mixture is well combined, thickened, and slightly whipped, about 2 minutes.

IMG_1685

IMG_1688

To assemble the cake

Using a serrated knife, trim tops of cakes to make level. Place four strips of parchment paper around perimeter of a serving plate or lazy Susan. Place the first layer on the cake plate. Using about 1/4 cup of the caramel, spread a thin layer on the cake, allowing some of the caramel to soak into the cake. Follow the caramel layer with a layer of about 1 cup of the ganache icing. *The caramel didn’t really soak in for me, so I just popped the cake + caramel layer in the freezer before topping with ganache, just so the second layer didn’t slide everywhere leaving me with a sloppy mess on my hands… Place the second layer on top and repeat process with another layer of caramel followed by a layer of ganache icing. Place the remaining layer on top of the second layer bottom side up. Spread entire cake with remaining ganache icing. Sprinkle with fleur de sel.

IMG_1724

getting messy... and way too heavy handed with the middle layer

IMG_1789

the finished product.. that finished me...

4 Comments

Filed under Uncategorized

sms: the cake from hell

IMG_1777

This week’s SMS bake, Devils Food Cake, turned out to be a *%$£ing nightmare.  Yes folks, a big, fat, sticky, gooey, creamy, acrid, prolonged torturous nightmare.  Don’t get me wrong – Melissa’s cake itself was heavenly.  It’s a simple enough recipe yielding moist, dark chocolate layers..which, in my case, baked up a bit unevenly because I failed to scrape the bottom of the bowl as religiously as I should have.. the centres shot skyward, only to sink the minute they came out of the oven.  Thankfully, this just seemed to result in slightly denser, more level cakes though, so I wasn’t particularly worried.  Now, sticking with the suggested peanut butter frosting at this point would have saved much blood, sweat and tearful cursing.  But, having done peanut butter frosting to death before (I fell in love with a cream cheese version and refuse to stray), I decided to take this opportunity to conquer my caramel demons by making the Sweet & Salty Cake from Baked.

IMG_1780

Known as their signature creation, it consists of chocolate cake slathered with salted caramel sauce and whipped caramel ganache frosting.  After reading a few negative reviews of the Baked cake itself, in contrast rave rants about the phenomenal frosting, I figured Melissa’s devils food cake would be the ultimate base.  Now, I’m not even a huge fan of caramel taste-wise, but making caramel is something I swore to conquer after my first two attempts went up in smoke a few months back.  literally.  Unfortunately, things got smokey this time round too.  In fact, I ended up having to make 4 – yes, 4 – batches of caramel this time..!!  As I said, the first went up in smoke. The second survived to become a luscious whipped ganache which turned into an impenetrable mass after an overnight stint in the fridge.  So clever me decided to try softening it in the microwave, and – you guessed it – pulled out a liquid mess after getting distracted for a few crucial minutes.  Devil cake 2, June 0.  Back to the Coop for more butter. and chocolate.

IMG_1808

I finally scored a win in round 3 (which I did NOT put in the fridge), but still had to play out round 4 to make the salted caramel sauce.  The whole process took about 4 days and  I’m out a hefty load of sugar, butter and chocolate, but I finally know how to make caramel.  Unfortunately, I had planned to share this devil child with friends, but the dinner date came and went before batch 3… So at the moment, I’ve got a big fat chocolatey waste sitting in my fridge. It’s cursed, I swear.

Despite all my whinging dramatics though, I have to admit that the whipped caramel ganache is phenomenal. Paired with the salted caramel sauce and Melissa’s gorgeous chocolate layers, this is one deliciously evil cake.  I recommend you roll up your sleeves and get sugar-cooking.  You can find the cake recipe on Holly’s lovely site and check out how the other SMSers got on this week

10 Comments

Filed under cake, caramel, chocolate, frosting, sweet melissa sundays

SMS: making whoopie… (hahaha)

Righto, we’re on a pumpkin roll here – what with Halloween around the corner and Thanksgiving not far behind (yay! yay!) – so this week’s SMS pick was a perfect follow on to the pumpkin patch cupcakes in my last post.  Melissa might refer to these as ‘cookie cakes’, but to me they’re whoopie pies and worth the namesake shout.  Funnily enough, I only had my first pumpkin version (you get chocolate too) last month after a pilgrimmage to Baked (of ‘Sweet & Salty Cake’ fame).  This involved a mahoooossive trek to Red Hawk that left me in a slightly sour mood.. which turned very sour when I realized they only had one cake on offer…that’s just mean. But luckily, they also had pumpkin whoopies, which sweetened the deal no end.  Since then, I’ve had me a cravin’!

IMG_1647

"What's in a name? That which we call a review.."

This recipe was super easy – notwithstanding the turmoil encountered when trying to find pumpkin puree.. in England. during the ‘Great Pumpkin Crisis of 2009’.  (See my pumpkin patch post for details.. if you really want…but it’s actually irrelevant – all is well, Waitrose saved the day).  I swapped the molasses for maple syrup, cranked up the cinnamon (always) and used my favourite cream-cheese frosting recipe in place of Melissa’s filling.   (It’s not too different, but I’ve added it below anyway).  All in all, I give these babies a 5/5 on ease and 5/5 on taste/texture combo. YUM. I’m only offering 2/5 stars on accessibility of ingredients though… I might try getting proactive about this (instead of whinging endlessly for the next month) by starting a petition for equal rights to fair-priced pumpkin puree for expats.

Bite me

Bite me

Having bought Baked and failing so far to use it (shame on me), I was hoping to manage an SM vs B-Boys bakeoff.  The recipes seem similar, although the Baked version calls for vegetable oil in place of butter, relatively more puree and sugar in relation to flour, plus ground ginger and cloves…and the cream cheese fillings are *slightly* different too. Obviously I failed to get said bakeoff on in time for this post… but my whoopie-pie love just grows and grows, so I’ll get around to it soon! very soon!  But for now I’d just like to offer Debbie a big, fat, (cream) cheesey thanks for her perfect seasonal pick! Please check out the SMS blogroll to see what the others put together! with filling… x

Pipeworthy cream-cheese frosting
4 oz. butter (relatively room temp)
8 oz. cream cheese  (take your pick – room temp or straight from the fridge.. it’s freeing, no?)
5 cups icing sugar (yes, 5. prepare for the high)

Directions: Whiz the butter and cream cheese in the food processor until combined (no big, separate lumps.. but don’t overprocess).  Add half the sugar and whizz again.  Scrape down the sides and add the rest of the sugar cup by cup (stopping to scrape down the sides) until you’re happy with the consistency.  Use at this point or pop the whole lot in the fridge for a firm-up.  (I hate it soft ‘n soupy, can you tell?)

12 Comments

Filed under cake, cookies, whoopie pie